


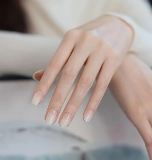
How To Take Off Gel Nails Safely At Home

Do you have gel nails? Are you considering getting them but are hesitant because of the removal process? Well, have no fear! Removing gel nails is a breeze when done correctly. In this blog post, we will teach you how to take off gel nails at home without damaging your natural nails. So, read on and learn how to take your gel nails off like a pro!
 Next, you will want to file your nails. This helps to break up the gel so that it can be removed more easily. Be sure to use a gentle back-and-forth motion and not to press too hard. You don't want to damage your natural nails!
When you think you've cleaned out the last of your top coating, slip your hand under a bright light and check your nails. Any remaining glossy patches will show where you still need to file. But be careful: if you start seeing natural nail spots, you've gone too far.
Next, you will want to file your nails. This helps to break up the gel so that it can be removed more easily. Be sure to use a gentle back-and-forth motion and not to press too hard. You don't want to damage your natural nails!
When you think you've cleaned out the last of your top coating, slip your hand under a bright light and check your nails. Any remaining glossy patches will show where you still need to file. But be careful: if you start seeing natural nail spots, you've gone too far.
 Below are five tips to help you take care of your nails after gel nail removal:
Tip #1
Be gentle with your nails: Your nails have been through a lot and are probably quite weak right now. Be sure to file them gently and avoid using harsh chemicals or detergents.
Tip # 2
Moisturize, moisturize, moisturize: This is key for keeping your nails healthy and preventing them from becoming brittle. Apply cuticle oil or lotion several times a day, especially after washing your hands.
Tip # 3
Wear gloves when cleaning: To protect your nails from further damage, be sure to wear gloves when doing any sort of cleaning, whether it's dishes or laundry.
Tip # 4
Avoid nail polish: For the first few days after gel nail removal, avoid wearing nail polish. This will give your nails a chance to breathe and recover.
Tip # 5
Eat healthily: Eating a balanced diet rich in vitamins and minerals will help your nails to grow strong and healthy. Be sure to eat plenty of leafy greens, nuts, and seeds.
Below are five tips to help you take care of your nails after gel nail removal:
Tip #1
Be gentle with your nails: Your nails have been through a lot and are probably quite weak right now. Be sure to file them gently and avoid using harsh chemicals or detergents.
Tip # 2
Moisturize, moisturize, moisturize: This is key for keeping your nails healthy and preventing them from becoming brittle. Apply cuticle oil or lotion several times a day, especially after washing your hands.
Tip # 3
Wear gloves when cleaning: To protect your nails from further damage, be sure to wear gloves when doing any sort of cleaning, whether it's dishes or laundry.
Tip # 4
Avoid nail polish: For the first few days after gel nail removal, avoid wearing nail polish. This will give your nails a chance to breathe and recover.
Tip # 5
Eat healthily: Eating a balanced diet rich in vitamins and minerals will help your nails to grow strong and healthy. Be sure to eat plenty of leafy greens, nuts, and seeds.
 If you don't have acetone or nail polish remover at home, you can purchase a gel nail remover from us! Here are some of our products:
How To Safely Remove Gel Nail Polish At Home
Below we give a detailed step-by-step guide on how to remove gel manicure safely at home.Step 1: Grab Everything You Need
To remove your gel nails, you will need:- Nail file: Using a nail file to "roughen up" the surface of gel polish may make it easier to remove.
- Acetone nail polish remover: Non-acetone nail polish remover is effective at removing conventional nail polish, but it isn't always as successful with gel polish.
- Orange stick or cuticle stick: This can help you remove any gel polish residue without causing your nail color to peel.
- Cuticle oil or petroleum jelly: Cuticle oil or petroleum jelly can be used to prevent your cuticle and the surrounding skin from harm caused by nail polish remover.
- Cotton balls: Cotton balls are not required, but they may help make the process of soaking off the nail polish easier.
- Tinfoil: Tinfoil is frequently used to drape the cotton balls over your nails, allowing the nail polish remover to soak but not submerge your fingertips.
- Nail buffer: After removing the gel polish, you'll need a nail buffer to smooth the surface of your nails.
Step 2: Find A Well-Ventilated Space To Work In
The fumes from the acetone can be pretty strong, so it's important to find a well-ventilated space to work in. This could be outdoors, in a garage with the door open, or even in front of an open window. Just make sure there is plenty of fresh air circulating.Step 3: File Your Nails
Next, you will want to file your nails. This helps to break up the gel so that it can be removed more easily. Be sure to use a gentle back-and-forth motion and not to press too hard. You don't want to damage your natural nails!
When you think you've cleaned out the last of your top coating, slip your hand under a bright light and check your nails. Any remaining glossy patches will show where you still need to file. But be careful: if you start seeing natural nail spots, you've gone too far.
Step 3: Protect Your Cuticles And Skin
Acetone, which will be required to remove your gels, can harm the skin surrounding your nails, so you'll need to guard them. Cuticle oil should be used before soaking to protect the immediate surroundings. If you don't want to, you don't need a high-end, specialty cuticle oil. Vaseline is a tried-and-true quick home cure that works every time. The petroleum jelly will form a barrier to protect the acetone from harm. Aquaphor and other similar products work as well.Step 4. Soak Some Cotton Balls In Acetone
Pour some acetone into a bowl or cup, then soak cotton balls in the liquid. The number of cotton balls you'll need will depend on the size of your nails. Once they're saturated, press them onto your gel nails and wrap each finger in foil to hold everything in place.Step 5: Wait For Ten To Fifteen Minutes
After about ten to fifteen minutes, check to see if the gel has started to lift away from your natural nail. If it has, use a cuticle pusher or an orange stick wrapped in cotton to gently push off the remaining gel. If the gel isn't budging, re-wrap and wait a few more minutes.Step 6: Remove The Foil And Cotton Balls
Carefully remove the foil and cotton balls. You may find that some gel has been removed, but there is still a top coat remaining. If this is the case, repeat steps four through six until all of the gel has been removed.Step 7: Clean Up Your Nails
Once all of the gel has been removed, it's time to clean up your nails. Wash your hands with soap and water to remove any traces of acetone. Next, use a nail file to gently buff away any roughness on the surface of your nails. Finally, apply cuticle oil or lotion to hydrate your nail beds and skin.5 Tips For Taking Care Of Your Nails After Gel Nail Removal
Below are five tips to help you take care of your nails after gel nail removal:
Tip #1
Be gentle with your nails: Your nails have been through a lot and are probably quite weak right now. Be sure to file them gently and avoid using harsh chemicals or detergents.
Tip # 2
Moisturize, moisturize, moisturize: This is key for keeping your nails healthy and preventing them from becoming brittle. Apply cuticle oil or lotion several times a day, especially after washing your hands.
Tip # 3
Wear gloves when cleaning: To protect your nails from further damage, be sure to wear gloves when doing any sort of cleaning, whether it's dishes or laundry.
Tip # 4
Avoid nail polish: For the first few days after gel nail removal, avoid wearing nail polish. This will give your nails a chance to breathe and recover.
Tip # 5
Eat healthily: Eating a balanced diet rich in vitamins and minerals will help your nails to grow strong and healthy. Be sure to eat plenty of leafy greens, nuts, and seeds.
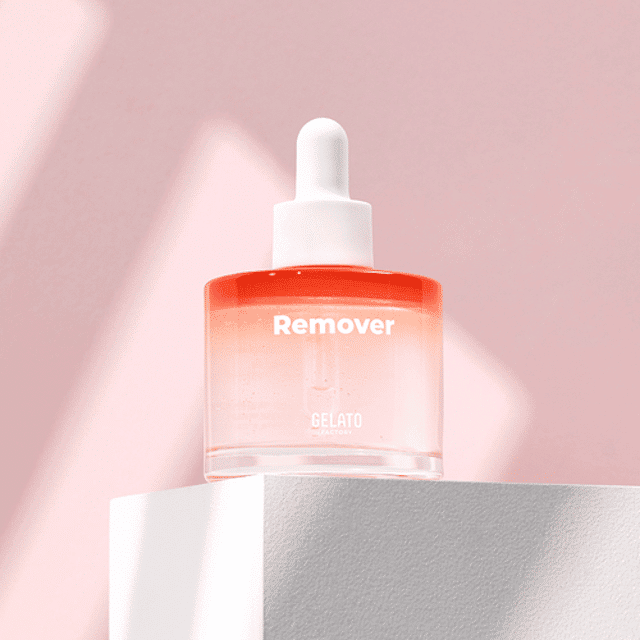
Need A Gel Nail Remover?
If you don't have acetone or nail polish remover at home, you can purchase a gel nail remover from us! Here are some of our products:
1. Sherbet Touch Remover
The Sherbet Touch Remover is a must-have for many semi-cured gel nail enthusiasts. This remover gives off a pleasant nectarine fragrance and feels clean and silky when applied. The best feature is how it makes getting rid of your nail polish strips a breeze. There are so many different semi-cured gel polish patterns to try that changing them out should be enjoyable as well!2. Edge Remover Serum
This Edge nail polish remover serum is a more gentle and healthy option than the harsh chemicals found in most nail polish removers. It's made of high-quality, all-natural materials that are safe for your nails and work quickly without harming them. Chamaecyparis obtusa Leaf extract and Phytonkera are among the three plant-based components included. It is also the ideal solution to remove all types of UV gels and even false nails. It is safe for sensitive skin and nails and made with the highest quality ingredients available.3. uuuuu MAGICAL SERUM REMOVER
This is a powerful and effective gel nail remover that will make your nails look better than ever. It's made with natural ingredients like biotin and collagen, which helps to strengthen nails. uuuuu Magical Serum Remover is also great for removing acrylics, gels, Shellac, and other types of nails. It comes in a convenient bottle that makes it easy to use.Semi Cured Nailed Stickers You Can Do At Home
Semi-cured gel nail wraps are real gel nail polishes that have been partially cured. They're flexible and stretchy, making them ideal for all nails of various shapes and sizes. Once they've been applied, they're UV-cured. The end result is shiny, hard, perfectly curved nails similar to those found in liquid gel polish. Get salon-quality gel nails without leaving your home. It's as simple as removing them using nothing more than warm water and mild cleansers.Benefits Of Using Semi Cured Stickers
Here are some of the benefits of using semi-cured stickers- Long-lasting: They can last up to two weeks with proper care.
- Easy to apply: You can do it yourself at home without any professional help
- Affordable: They are much cheaper than getting your nails done at a salon
- Convenient: You can take them off whenever you want without having to go back to the salon
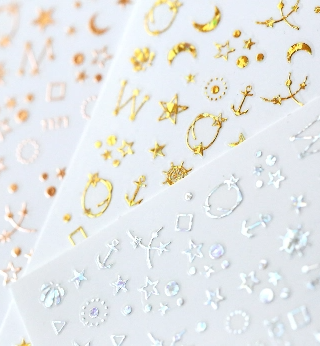
- Many designs: There are many different designs and colors to choose from, so you can find the perfect one for you.