

What Are Ombre Nails?

What are ombre nails? This is a question that has been asked a lot lately, and for a good reason. Ombre nails are all the rage right now! They are a fun, trendy way to show your personality through your nails. This blog post will discuss what ombre nails are, how to do them, and some of the best tips for taking care of them.
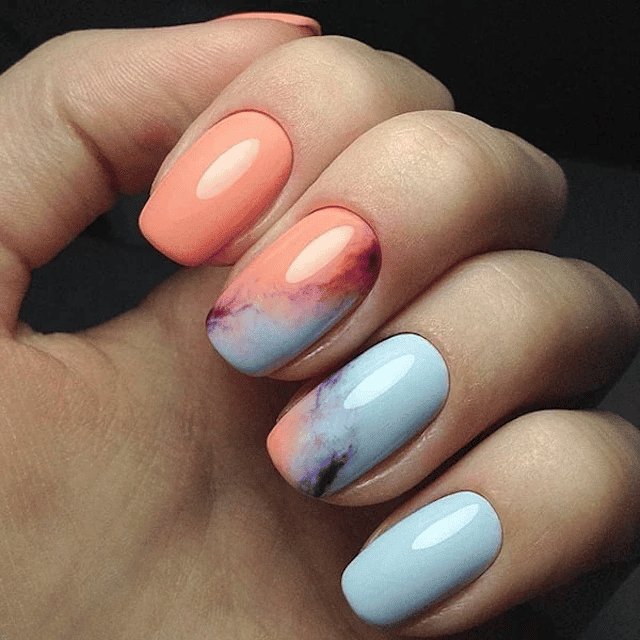
 Ombre nails are a kind of manicure that involves painting the nails with two or more colors, usually graduating from light to dark. The word "ombre" comes from the French word meaning "shaded" or "shadowed."
According to Jade Tang, the term "ombre nail" originated after the Second World War, a nail artist who spoke with Refinery29. She said it stems from the traditional French manicure and dates back to the 1940s or thereabouts.
It was popular to paint one's nails in light pastel colors such as white and pink during that era (the baby boomer years).
Ombre nails are a kind of manicure that involves painting the nails with two or more colors, usually graduating from light to dark. The word "ombre" comes from the French word meaning "shaded" or "shadowed."
According to Jade Tang, the term "ombre nail" originated after the Second World War, a nail artist who spoke with Refinery29. She said it stems from the traditional French manicure and dates back to the 1940s or thereabouts.
It was popular to paint one's nails in light pastel colors such as white and pink during that era (the baby boomer years).
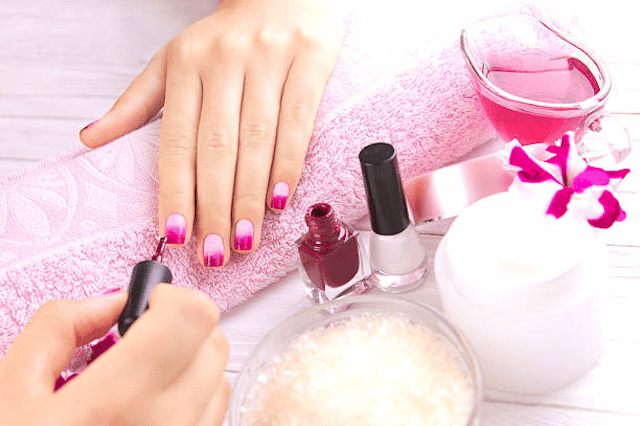 The first step in getting ombre nails is to paint your nails with a light base color. Once that has dried, you will need to apply a piece of tape or plastic wrap over the part of the nail where you want the darker color to start.
Then, paint the exposed part of your nail with a darker shade. Carefully remove the tape or plastic wrap, and you should have a nice gradient effect.
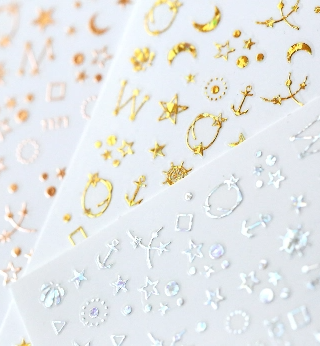
If you want to get really creative with your ombre nails, you can try using multiple colors or even adding glitter or other embellishments. Just make sure that the base color is dry before adding anything on top. You can achieve ombre nails with either acrylic or gel.
Acrylic is a type of plastic applied over the nails and then set with a UV light, while the gel is a type of nail polish cured with a UV light. Both methods will give you long-lasting results, but the gel is generally considered better for your nails because it does not require harsh chemicals to remove it.
Regardless of the nail type, a few different techniques can be used to paint ombre nail designs. One popular technique is to apply a white base coat to the nails, then use a sponge to apply the darker shade of polish around the edges of the nails.
Another technique is to paint each nail with a different color and then blend the colors with a brush or toothpick. Whichever technique you use, the key to creating ombre nails is patience and working slowly so that the colors blend together seamlessly.
The first step in getting ombre nails is to paint your nails with a light base color. Once that has dried, you will need to apply a piece of tape or plastic wrap over the part of the nail where you want the darker color to start.
Then, paint the exposed part of your nail with a darker shade. Carefully remove the tape or plastic wrap, and you should have a nice gradient effect.
If you want to get really creative with your ombre nails, you can try using multiple colors or even adding glitter or other embellishments. Just make sure that the base color is dry before adding anything on top. You can achieve ombre nails with either acrylic or gel.
Acrylic is a type of plastic applied over the nails and then set with a UV light, while the gel is a type of nail polish cured with a UV light. Both methods will give you long-lasting results, but the gel is generally considered better for your nails because it does not require harsh chemicals to remove it.
Regardless of the nail type, a few different techniques can be used to paint ombre nail designs. One popular technique is to apply a white base coat to the nails, then use a sponge to apply the darker shade of polish around the edges of the nails.
Another technique is to paint each nail with a different color and then blend the colors with a brush or toothpick. Whichever technique you use, the key to creating ombre nails is patience and working slowly so that the colors blend together seamlessly.
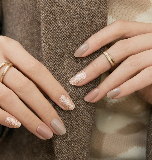
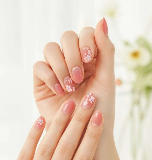
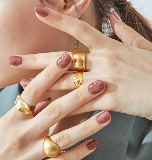
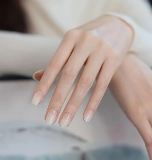
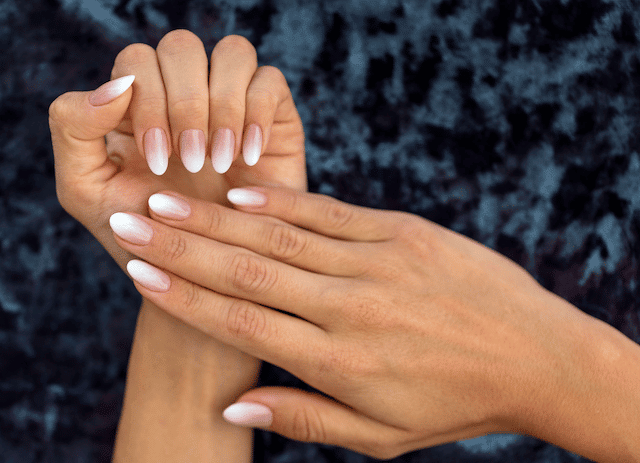
 Choosing the right colors for your ombre nails is important if you want to create a stylish and flattering look. If you are fair-skinned, you might want to try light pink ombre nails or peachy nude ombre nails.
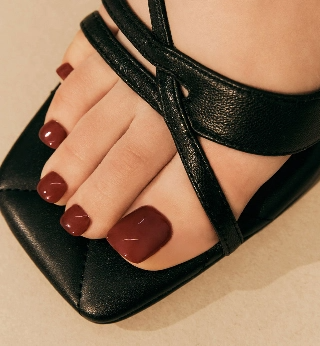
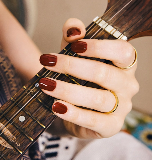
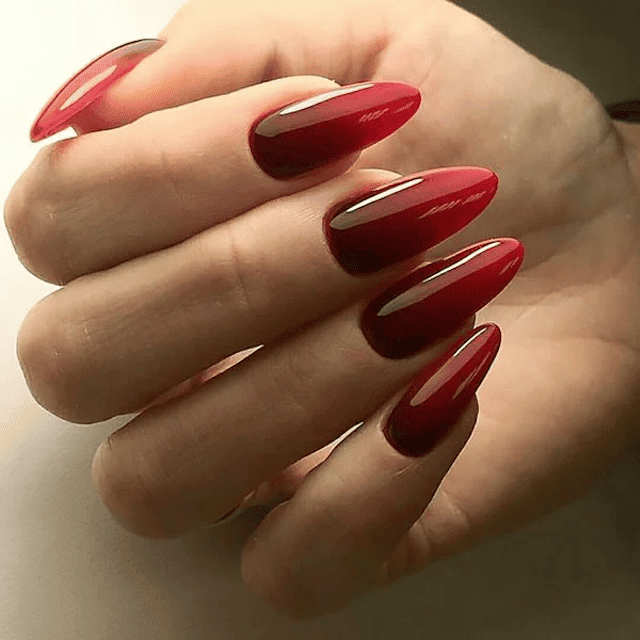
Richer shades like burgundy or plum can be stunning for those with darker skin. If you can't decide on just one color, try using two or three shades that complement each other.
Other variations of regular colored nails include:
Choosing the right colors for your ombre nails is important if you want to create a stylish and flattering look. If you are fair-skinned, you might want to try light pink ombre nails or peachy nude ombre nails.
Richer shades like burgundy or plum can be stunning for those with darker skin. If you can't decide on just one color, try using two or three shades that complement each other.
Other variations of regular colored nails include:
 This look is achieved by adding glitter to either the tips or the bottom of the nails. Start with a base coat of polish, then apply a layer of glitter to get this look. Next, use a sponge to apply the glitter to the nails. You can use a toothpick to apply the glitter for a more subtle look. Glitter of all colors can be used for this look.
 Ombre coffin nails are popular among nail art fans, but they may be frightening to those who are new to the trend. However, with an ombre style, there's no denying that this unusual design looks stunning. While not all coffin nails need to be lengthy, their cut-off tips and sharp angles will complement your chosen gradient when extended beyond the fingertips.
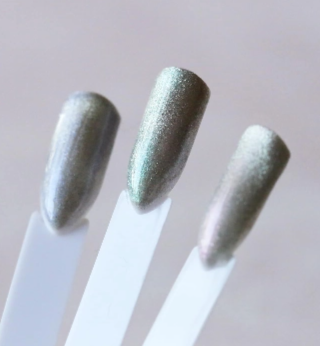
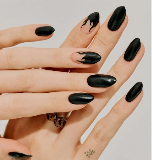
 You may give your fingers a sleek, matte ombre finish for your next salon visit by mixing in a little powder coating. This flat enamel has a more modest appearance on the surface, yet it creates an impressively sophisticated effect. Matte ombre designs exude elegance with an ultra-modern feel.
 This look is created by using two contrasting colors. For example, you could use light pink and dark purple Start with a base coat of a lighter color to get this look. Once that has dried, apply the darker shade around the edges. Use a brush or toothpick to blend the two colors together.
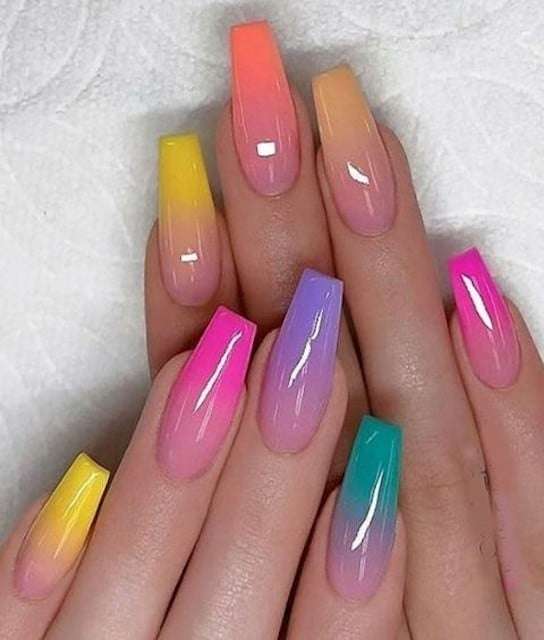 As the name suggests, this look is created using multiple colors. To get this look, start with a base coat of polish Once that has dried, use a sponge to apply the different colors around the edges of the nails. Use a toothpick to blend the colors together.
 This is a classic ombre look that involves painting the tips of the nails with a light color and the bottom of the nails with a dark color. To get this look:
 This is a fun and creative way to do ombre nails. Start with a base coat of polish, then use a different color polish for each nail to get this look. To create the ombre effect, use a sponge to blend the colors together.
There are endless possibilities when it comes to ombre nails So, get creative and have fun experimenting with different color combinations. And don't forget, if you're not sure how to do ombre nail art yourself, you can always book an appointment with a professional nail artist.
This is a fun and creative way to do ombre nails. Start with a base coat of polish, then use a different color polish for each nail to get this look. To create the ombre effect, use a sponge to blend the colors together.
There are endless possibilities when it comes to ombre nails So, get creative and have fun experimenting with different color combinations. And don't forget, if you're not sure how to do ombre nail art yourself, you can always book an appointment with a professional nail artist.
 Ombre nails are a bit more high-maintenance than regular manicures, so it's important to take extra care of them. You can ensure that your ombre nails will look their best by following these tips.
Be careful with your nails: Avoid using your nails as tools, and try not to catch them on things. You don't want to risk chipping or damaging your nails.
Apply a top coat of polish: This will help to protect your nails and keep the colors looking fresh. You can do this every few days or as needed.
Keep your nails clean and dry: This will help prevent the colors from fading. Moisture can also cause the colors to bleed, so be sure to dry your nails thoroughly after washing your hands.
Be gentle when removing your polish: when it's time to remove your ombre nails, soak them in acetone for a few minutes before gently rubbing the polish off with a cotton ball. Avoid using nail polish remover that contains alcohol, which can dry out your nails.
The recommended way to remove glitter ombre nails is by using a toothpick Gently scrape the glitter off with the toothpick, careful not to damage your nails.
Use cuticle oil: Apply cuticle oil to your nails every day to keep them hydrated and prevent the colors from fading. Cuticle oil is available at most beauty supply stores. You can get it online or in-store
Ombre nails are a bit more high-maintenance than regular manicures, so it's important to take extra care of them. You can ensure that your ombre nails will look their best by following these tips.
Be careful with your nails: Avoid using your nails as tools, and try not to catch them on things. You don't want to risk chipping or damaging your nails.
Apply a top coat of polish: This will help to protect your nails and keep the colors looking fresh. You can do this every few days or as needed.
Keep your nails clean and dry: This will help prevent the colors from fading. Moisture can also cause the colors to bleed, so be sure to dry your nails thoroughly after washing your hands.
Be gentle when removing your polish: when it's time to remove your ombre nails, soak them in acetone for a few minutes before gently rubbing the polish off with a cotton ball. Avoid using nail polish remover that contains alcohol, which can dry out your nails.
The recommended way to remove glitter ombre nails is by using a toothpick Gently scrape the glitter off with the toothpick, careful not to damage your nails.
Use cuticle oil: Apply cuticle oil to your nails every day to keep them hydrated and prevent the colors from fading. Cuticle oil is available at most beauty supply stores. You can get it online or in-store
 If you want to remove your ombre nail polish, you can do a few things to minimize the damage to your nails. First, soak your nails in acetone for a few minutes. This will help to break down the polish and make it easier to remove.
Acetone is a harsh chemical, so be sure to use it in a well-ventilated area. It also dries up easily. Hence, you should follow up with a cuticle oil or lotion.
Next, use a cotton ball to remove the polish gently. Start at the base of the nail and work your way up. Be careful not to scrub too hard, as this can damage the nail.
Finally, apply a moisturizer or cuticle oil to your nails to help hydrate them and minimize the damage. You can also visit a professional if you want to get your ombre nails removed. They will have the tools and knowledge to remove your nails without damaging them.
If you want to remove your ombre nail polish, you can do a few things to minimize the damage to your nails. First, soak your nails in acetone for a few minutes. This will help to break down the polish and make it easier to remove.
Acetone is a harsh chemical, so be sure to use it in a well-ventilated area. It also dries up easily. Hence, you should follow up with a cuticle oil or lotion.
Next, use a cotton ball to remove the polish gently. Start at the base of the nail and work your way up. Be careful not to scrub too hard, as this can damage the nail.
Finally, apply a moisturizer or cuticle oil to your nails to help hydrate them and minimize the damage. You can also visit a professional if you want to get your ombre nails removed. They will have the tools and knowledge to remove your nails without damaging them.
 So there you have it, everything you need to know about ombre nails. If you're looking for a trendy look that is simple to execute and won't require too much upkeep, then give ombre nails a try. Be sure to shop our selection of the best ombre nail polishes and products so you can get started on your own set of gorgeous ombré nails today.
So What Exactly Are Ombre Nails?
Ombre nails are a kind of manicure that involves painting the nails with two or more colors, usually graduating from light to dark. The word "ombre" comes from the French word meaning "shaded" or "shadowed."
According to Jade Tang, the term "ombre nail" originated after the Second World War, a nail artist who spoke with Refinery29. She said it stems from the traditional French manicure and dates back to the 1940s or thereabouts.
It was popular to paint one's nails in light pastel colors such as white and pink during that era (the baby boomer years).
How Are They Done?
The first step in getting ombre nails is to paint your nails with a light base color. Once that has dried, you will need to apply a piece of tape or plastic wrap over the part of the nail where you want the darker color to start.
Then, paint the exposed part of your nail with a darker shade. Carefully remove the tape or plastic wrap, and you should have a nice gradient effect.
If you want to get really creative with your ombre nails, you can try using multiple colors or even adding glitter or other embellishments. Just make sure that the base color is dry before adding anything on top. You can achieve ombre nails with either acrylic or gel.
Acrylic is a type of plastic applied over the nails and then set with a UV light, while the gel is a type of nail polish cured with a UV light. Both methods will give you long-lasting results, but the gel is generally considered better for your nails because it does not require harsh chemicals to remove it.
Regardless of the nail type, a few different techniques can be used to paint ombre nail designs. One popular technique is to apply a white base coat to the nails, then use a sponge to apply the darker shade of polish around the edges of the nails.
Another technique is to paint each nail with a different color and then blend the colors with a brush or toothpick. Whichever technique you use, the key to creating ombre nails is patience and working slowly so that the colors blend together seamlessly.
How To Choose The Right Color For Your Ombre Nails
Choosing the right colors for your ombre nails is important if you want to create a stylish and flattering look. If you are fair-skinned, you might want to try light pink ombre nails or peachy nude ombre nails.
Richer shades like burgundy or plum can be stunning for those with darker skin. If you can't decide on just one color, try using two or three shades that complement each other.
Other variations of regular colored nails include:
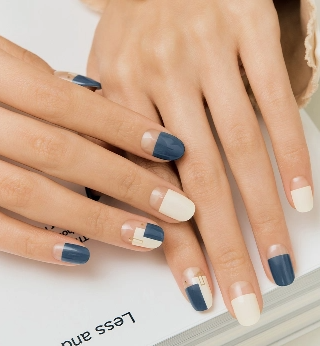
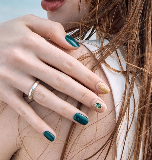
- Blue ombre nails
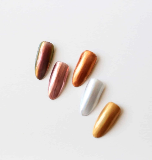
- Orange ombre nails
- White ombre nails
- Red ombre nails
- Rose gold ombre
- Yellow ombre nails
- Gold ombre nails
- Purple ombre nails.
Ombre Nail Designs
Not sure what type of ombre nails to try? Here are a few popular options:Glitter Ombre Nails
This look is achieved by adding glitter to either the tips or the bottom of the nails. Start with a base coat of polish, then apply a layer of glitter to get this look. Next, use a sponge to apply the glitter to the nails. You can use a toothpick to apply the glitter for a more subtle look. Glitter of all colors can be used for this look.
Ombre Coffin Nails
Ombre coffin nails are popular among nail art fans, but they may be frightening to those who are new to the trend. However, with an ombre style, there's no denying that this unusual design looks stunning. While not all coffin nails need to be lengthy, their cut-off tips and sharp angles will complement your chosen gradient when extended beyond the fingertips.
Matte Ombre Nails
You may give your fingers a sleek, matte ombre finish for your next salon visit by mixing in a little powder coating. This flat enamel has a more modest appearance on the surface, yet it creates an impressively sophisticated effect. Matte ombre designs exude elegance with an ultra-modern feel.
Two-tone Ombre Nails
This look is created by using two contrasting colors. For example, you could use light pink and dark purple Start with a base coat of a lighter color to get this look. Once that has dried, apply the darker shade around the edges. Use a brush or toothpick to blend the two colors together.
Multiple Color Ombre Nails
As the name suggests, this look is created using multiple colors. To get this look, start with a base coat of polish Once that has dried, use a sponge to apply the different colors around the edges of the nails. Use a toothpick to blend the colors together.
French Ombre Nails
This is a classic ombre look that involves painting the tips of the nails with a light color and the bottom of the nails with a dark color. To get this look:
- Start with a base coat of polish, then use a brush to apply the light color to the tips of the nails.
- Use a sponge to apply the dark color to the bottom of the nails.
- Use a toothpick to blend the two colors together.
Color Blocking Ombre Nails
This is a fun and creative way to do ombre nails. Start with a base coat of polish, then use a different color polish for each nail to get this look. To create the ombre effect, use a sponge to blend the colors together.
There are endless possibilities when it comes to ombre nails So, get creative and have fun experimenting with different color combinations. And don't forget, if you're not sure how to do ombre nail art yourself, you can always book an appointment with a professional nail artist.
Tips For Taking Care Of Your Ombre Nails
Ombre nails are a bit more high-maintenance than regular manicures, so it's important to take extra care of them. You can ensure that your ombre nails will look their best by following these tips.
Be careful with your nails: Avoid using your nails as tools, and try not to catch them on things. You don't want to risk chipping or damaging your nails.
Apply a top coat of polish: This will help to protect your nails and keep the colors looking fresh. You can do this every few days or as needed.
Keep your nails clean and dry: This will help prevent the colors from fading. Moisture can also cause the colors to bleed, so be sure to dry your nails thoroughly after washing your hands.
Be gentle when removing your polish: when it's time to remove your ombre nails, soak them in acetone for a few minutes before gently rubbing the polish off with a cotton ball. Avoid using nail polish remover that contains alcohol, which can dry out your nails.
The recommended way to remove glitter ombre nails is by using a toothpick Gently scrape the glitter off with the toothpick, careful not to damage your nails.
Use cuticle oil: Apply cuticle oil to your nails every day to keep them hydrated and prevent the colors from fading. Cuticle oil is available at most beauty supply stores. You can get it online or in-store
How To Remove Ombre Nail Polish
If you want to remove your ombre nail polish, you can do a few things to minimize the damage to your nails. First, soak your nails in acetone for a few minutes. This will help to break down the polish and make it easier to remove.
Acetone is a harsh chemical, so be sure to use it in a well-ventilated area. It also dries up easily. Hence, you should follow up with a cuticle oil or lotion.
Next, use a cotton ball to remove the polish gently. Start at the base of the nail and work your way up. Be careful not to scrub too hard, as this can damage the nail.
Finally, apply a moisturizer or cuticle oil to your nails to help hydrate them and minimize the damage. You can also visit a professional if you want to get your ombre nails removed. They will have the tools and knowledge to remove your nails without damaging them.
Bottom Line
So there you have it, everything you need to know about ombre nails. If you're looking for a trendy look that is simple to execute and won't require too much upkeep, then give ombre nails a try. Be sure to shop our selection of the best ombre nail polishes and products so you can get started on your own set of gorgeous ombré nails today.


